Tuesday, December 16, 2014

Thinking about mom..........................


Here's a quilt that I made in 2006 for my mother, Enola. She was in the Alzheimer's wing at the Villa. I thought she needed a pretty quilt to go on her bed. This quilt made me think of her because she always had beautiful flowers and would spend many hours in the garden.  The only problem was she didn't want to use it cause she didn't want to mess it up. Hum! So it was never used it sat in her closet.  I got it back when she passed away this year. So now when I see it I think of her.

Love you Mom and miss you.

Keep Stitchin'
Connie

Thursday, November 13, 2014

It's Ladybug Time...................................


My latest project has been a quilt for one of my granddaughters for Christmas.  This pattern was so much fun to make.  All blocks were made from my stash that I had already.  Since the pattern had lady bugs and a flower I decided to go with a summer theme. In the center of each block represents something about summer.  There are flip flops, butterflies, bugs, birdhouses and worms.  I thought she'd get a kick out of all the insects.


I just love this flower and I'm sure I'll incorporate it into other quilts some day.

Lady bugs have small beads for eyes and there antennas are embroidered with black thread.  I will add eyes and antennas when I get it back from the quilter.

I framed my quilt with a small black border and another larger border of red.  My big border I used just left over pieces from the quilt to make it look scrappy.  I hope she likes it.

Off to the quilter now.

keep on stitchin,
Connie

Thursday, November 6, 2014

A New Look ............................................

Things seem to get in my road and I don't get to blog as much as I would like.  Its not that I haven't been sewing I just don't get to sew as often as I like.  Things are going to change starting today.  More posts are going to be made so stay in touch.

I've been sewing in my basement and it felt like a basement, dark.  I've added some lighting and my newest item I've added is a cutting table.  In one of my earlier posts I showed you my Murphy table that stashed away in one of my cabinets at the other house. Well my son wasn't using it, he now rents the house from me, so I ask if I could have it.  He needed the storage so I got my table. 
I now have a BIG cutting table and finally have some place to cut, lay things out and still have room for more.  Just love it.  Went to a cabinet shop and purchased some ready made cabinets to put under the table.  Now I have even more storage with drawers and shelves. To my surprise some of the cabinets are empty. 


There is even room under the table for my 2 1/2 year old granddaughter, Mariah to have a house to play in.  You will find her taking her babies and books in the secret hiding place.  If you listen close you might even hear her sing.

This is where she is stashing her things so Grandma can't put them away. :)


 Anyway as you can see in the picture I now have a big cutting table, big ironing board and a big table to set my sewing machine on.  It is so nice to have all this room.  I'm really enjoying sewing again.  What a difference it makes.

I've still got a few more things I want to do with the space but had to brag a little about what I got.

Keep on stitchin'
Connie

Wednesday, August 27, 2014

Noah's Friends......................


This is made from the same designer as the Mother Goose Quilt I made earlier.  This theme was "Noah's Friends." Every block was appliqued using the blanket stitch on my sewing machine. Don't all the animals look so happy!  While I was making this I sewed the same block 2 times.  One quilt was for the shop and another a shower gift.  I thought these really turned out cute. These quilts are so much fun to do.


Then in this picture I did Noah's Ark theme, from the same pattern, for the Toddler Sunday School classroom.  The kids were so excited to see these on there wall.  They had repainted all the walls and windows, redid the floor, painted the little chairs and resealed the table.  Everything looked GREAT!

Keep stitchin,
Connie

Tuesday, July 29, 2014

Start somewhere..................

One of my first wall hangings that I ever made.  I had the theme of watermelon's in my kitchen so when I saw this pattern I fell in love with it.  Then what Kansas girl doesn't like sunflowers in any size.  Of course when you have plenty of fields in Kansas with different types of grains you will always have the black birds.  Whether you like them or not they're still one of God's creations.

Since I've made this pattern I have learned many new techniques that would have made sewing this together much easier.  No matter what age a person is they can always learn new techniques whether on your own or in a classroom or just sewing or getting together with a friend.  Sew don't be scared to start with a pattern and learn from there!  Your local quilt shop will be glad to help you with a beginning project.

Sew keep on stitchin or start stitchin,

Connie

Wednesday, July 16, 2014

Kelcie's T Shirt Quilt

Wanted to share with you a T Shirt Quilt  Kelcie, my niece made.  She took her husbands KU football shirts and jerseys and made them into this beautiful quilt.  I want you to know that this is her first quilt she has ever made and sewed together.  She did all the designing on her own.  She figured out all the sizes of the blocks and cut them out.  The only thing I showed her was how to cut the T shirt and iron on the stabilizer.
I'm sure she could have figured that on her own.  For her first quilt I think she did an awesome job.  I hope this has inspired her to continue on with her sewing and making beautiful wall hangings and quilts.  Now it is at the quilter and she's anscious to get it finished to give to her husband.
Good job Kelcie!!

Wednesday, April 30, 2014

Hummin along...............................

Here is another Christmas quilt I made for a grandson.  This one has old cars, which is a panel, that I cut squares out.  These car blocks each had a border with different colors already so I just used those and didn't add another one. Then I took the contrasting material of all the cars and cut the same size squares.  I didn't do a small border on these because it was black against black.  Used checkerboard material for an additional border.  I needed length and had some chevron blocks left over so added them to the top and bottom.  For the last border I used flame material.

The grandsons really liked the old cars and I knew my quilts were a hit with them!  He was very excited to receive this quilt from his Grandma.


In one of my other posts I talked about panels.  Don't be scared to buy one and use it.  It's intimidating at first but you can make some really nice quilts incorporating them into your design.

So keep stitch'in,
Connie

Wednesday, March 26, 2014

Twist and Shout......

My granddaughter, Mariah who just celebrated her 2nd birthday needed a dollie blanket.  Well Grandma thought she did because I was tired of folding up a larger blanket to fit her dollie and then within a minute she wanted me to do it again.

I had seen a tutorial on the "Twister" tool and it fascinated me. If you have a chance and you're on You Tube search for the Twister tool and watch it. See if it made you want to try it! Well anyway, I purchased the Twister tool that fit 5" charms called the "Lil Twister."  There is another tool that works with a 6 1/2" square and called the "Midi Twister." A short version of the instructions is you lay out all your squares adding sides, top and bottom borders. Tip:  Make sure you have different colors that don't match your border.  If you notice on mine (right hand side on bottom row) I have a blue charm pinwheel in a corner and it just blends in with the border.  You can make this any size you want but I wanted a doll blanket sizeso that's why I chose the 5" squares.  Then you start in the left hand corner and match seams to the black x on the tool and cut.  Keep cutting across the top row that you've sewn. 

Make sure you line these cut blocks up as you go so you're pinwheels will line up right when you sew
them.  If you notice in the picture on the right you can see the 4 individual squares that make the big square.  You would get this when you sew the next row onto the previous row.

When you cut be sure to save your scraps because there is a smaller twister tool for 2 1/2" squares.  You're not really loosing hardly any fabric.  I have cut all my 2 1/2" squares from scraps and some day will get them sewed up and use the smaller twister tool to make another very small quilt.  So keep watching my blog because one of these days I'll have that mini quilt to show.

Well watch the tutorial, get yourself a twister book and start sewing those squares together!  It's additive!!

Keep stitchin,
Connie

Monday, March 17, 2014

Mother Goose Nursery Rhyme Quilt..................


Saturday I returned to Kessler Kreations quilt shop in Hillsboro, Ks that I’ve been sewing for.  If you look back through my blog I had made “Mother Goose Nursery Rhymes” quilt blocks.  Now you can have a look at them all sewn together.  I really thought it turned out cute.  It’s so bright and cheery.  What little child wouldn’t like to drool all over it!


Now I’m on her next project and that is “Noah’s Ark” blocks.  Made from the same company so be ready they’ll be coming soon.

In the meantime,

Keep Stitchin’
Connie

Tuesday, March 11, 2014

Make My Day Colorful

Here is one of my Christmas quilts that I made for one of my grandsons.  "Chevron" is the name of the main pattern but I really just did what I wanted to as far as designing it.  I really love this quilt because of all the colors in it.  I hate to say this but this was a UFO project in my closet for many, many years and I mean many (7 I think).  Decided if I didn't work on it I was going to throw what I had done away.  I hated to do that because I had enough blocks made for 1 1/2 rows so I proceeded with working on it off and on.

Knowing last year I was going to make each of my grandsons a quilt for Christmas I decided this was going to be one of them.  I worked on this one first because it probably would take the most time.  I have to say I really liked the finished product because of all the colors.  Don't be scared to attempt this kind of quilt.  It might look hard but its really not.  The worst part was trying to keep the colors straight with what colors to put on the next block.

Give it a try! Until next time,

Keep on stitch,

Connie

Thursday, January 9, 2014

Cho Cho.................


Several years ago, well more than several, I made my grandsons a train quilt.  I had found a panel at Walmart, which is the center of the quilt, and then went and designed from there.  Pulling the colors out of the panel I picked the bright colors such as yellow, red, green and blue.  Out of these colors I made a 9 patch to go in each corner of the borders.  


Now if you look close you will see that in between the borders I added a 2” sashing of rail material.
Yes, that is the whole piece nothing but rails, rails and rails.  I fuzzy cut the rails out so they would run straight. I found this material on a shop hop in a little shop in the country.  No town for miles around but they had everything.  Couldn’t believe it and I bought a large amount because I figured I’d never find it again.  Still have some left and probably should sell it because I don’t think I’ll ever use it again. 

I seen one of the quilts about a month ago and they have really worn well.  The mother says that’s all they use when they sleep or cold sitting on the couch.  Glad they enjoy them.

Again don't be scared to buy a panel and make it your own quilt.  It's fun and whoever receives it will love it forever.

Here's to keep a stitchin'
Connie

Monday, January 6, 2014

"Handprint With Love"

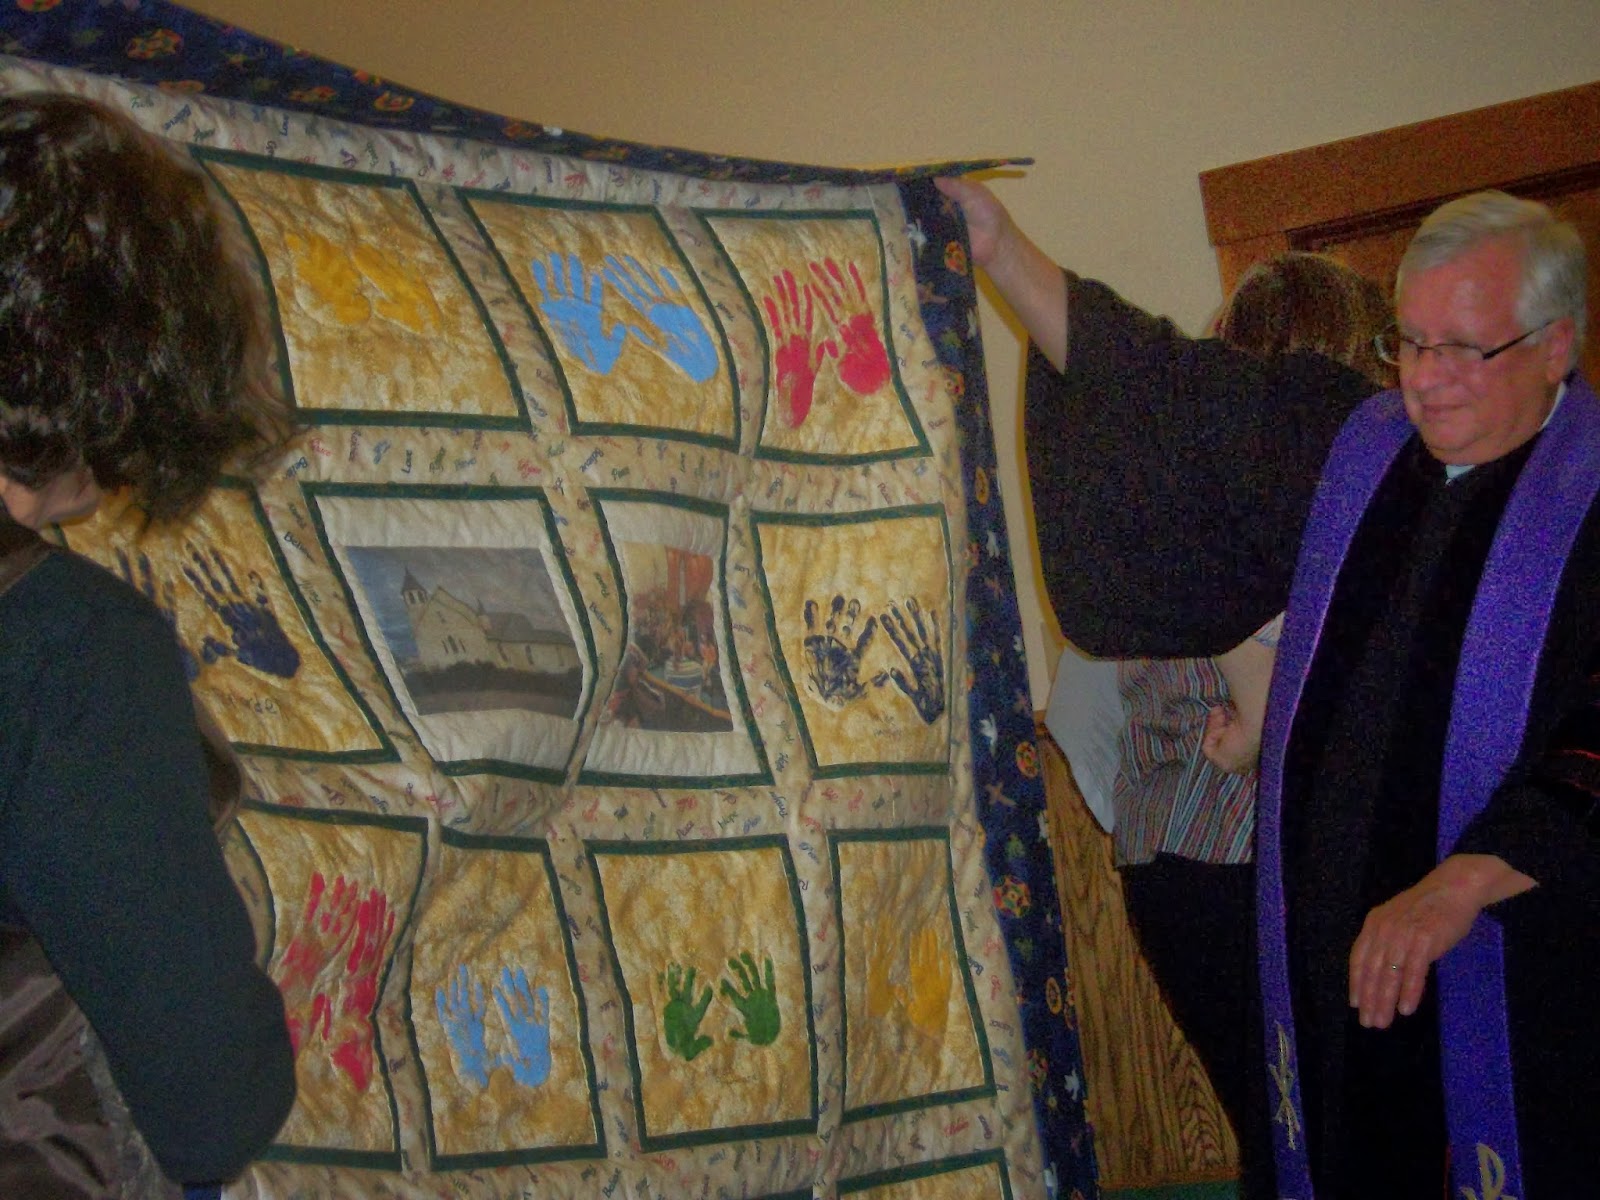
On December 22, 2013 our Sunday School children presented our preacher, Dr. Gary and his wife, MiMi with this "Handprint With Love" quilt during the Children's Sermon.

The children each took a turn picking out the color of paint and then rubbing the paint on there hand and laying it on the fabric.  When the fabric was dry I heat set it by ironing.  I then added sashing between each block and joined the blocks together with another long piece of sashing.  Added borders of darker material to finish it off.  I used 2 pieces of religious material in this quilt with religious symbols and words of many colors.

The machine quilter set off the hands by quilting around them.  Then finished the blocks with a stitch in a ditch.

The preacher and his wife were very excited that something this special was made for them and will cherish it. 

To end the blog I'd like to let you read what the children said before they presented the quilt:

Dr. Gary........
Our God has sent you to this place
To lead us in the way
That He would have us work and think
And live from day to day.
We thank you for your ministry.
Your guidance and your care.
His greatest blessings for your life
Is our most humble prayer.

Another child read:
MiMi....
When we thank God for our pastor
We must give Him thanks for two.
For when your husband came to us,
God also sent us you.
A pastor's wife must be many things.
You have many hats to wear,
And we say thanks for all you do
And lift you up in prayer.

Another child read:
With our hands we made this quilt,
We each made a special part,
To show you that you warm our heart
And the friendship that we share.

It was fun to watch the children eyes during the time when Dr. Gary and MiMi were opening the gift.

Well keep on stitchin, until next time,
Connie